
In Practice
Underwater Photography & GoPro
Underwater photography for divers — why photos turn out blue, how to fix it with proximity, light and white balance, composition, working with a GoPro, and shooting East Africa's marine life responsibly.
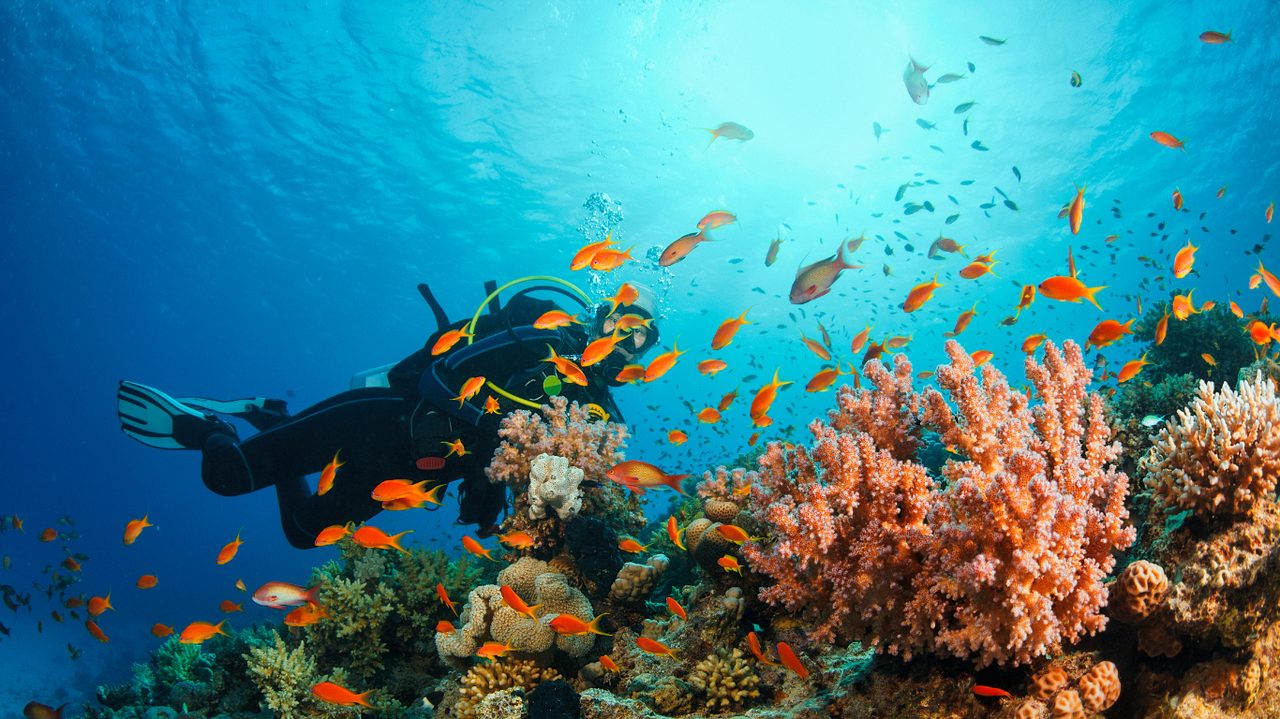
Everyone wants to capture the manta, the whale shark or that colourful reef, but most underwater photos disappoint: bluish, blurred, far away. This topic explains why that happens and how to fix it, with the fish and reef life of East Africa (and Mozambique in particular) as the subject you practise on.
You see a beautiful scene underwater: a manta ray circling above a cleaning station at Tofo, a moray eel peering from a crevice, a school of barracuda spinning like a silver tornado. You press the shutter, and back home the photo turns out blue-green, dull and further away than it felt. That is not bad luck and not a bad camera: it is physics. Water absorbs colour (red first) and refracts light (everything looks bigger and closer), exactly as in the physics topic. Underwater photography is largely the clever handling of those two phenomena.
The good news is that with a few principles and a GoPro or simple camera you can already shoot far better, without expensive equipment. The most important "setting" is not in the menu: it is getting close, bringing light, and behaving as a calm, well-trimmed diver so your subject stays. East Africa, and the Mozambican reefs at Tofo and the Bazaruto Archipelago near Vilanculos, is one of the richest stages to practise this: colourful hard and soft coral at 12 to 20 metres, moray eels, barracuda, grouper (rock cod) and trevally, plus the big stars (manta, whale shark, turtle, dolphin and the rare dugong).
Photography is applied physics and behaviour. The two biggest enemies of your photo are colour absorption and distance (both physics), and the third is a badly behaved diver. Solve those three, get close, bring light, hover calm and trimmed, and your photos improve more than with any expensive lens.
Key concepts
| Term | Short definition | Why it matters |
|---|---|---|
| Colour absorption | Water absorbs colour, red first | Explains blue, dead photos |
| Refraction | Light bends; everything looks bigger/closer | Affects focusing and composition |
| Getting close | Less water between lens and subject | The most important "rule" of all |
| Artificial light/flash | Bringing light to restore colour | Restores red/colour at depth |
| Red filter | Filter that cuts blue (for ambient light) | Colour correction without flash, shallow |
| White balance | Camera setting that corrects colours | More natural colour in ambient light |
| Backscatter | Particles reflecting the flash light | "Snow" in your photo; avoid with light angle |
| Wide-angle | For large subjects/scenes up close | Manta, reef scene, whale shark |
| Macro | For small subjects, very close | Nudibranch, shrimp, a moray's eye |
Understanding underwater photography
Why photos disappoint: the physics
Two phenomena from the physics topic decide almost everything. Colour absorption: water absorbs colour from red to blue. Within a few metres red is gone, deeper orange and yellow disappear, and at 20 to 30 metres everything is blue-green. A bright red lionfish or a yellowfin trevally looks grey at depth. The more water between your lens and the subject, the more colour is gone. Refraction: light bends at the water-air boundary, so everything looks about a third bigger and a quarter closer than it really is. Your subject is therefore further away than it looks, meaning even more colour loss over that extra distance. The conclusion is one simple instruction that governs everything: get closer. Every metre less water between you and the subject restores colour, sharpness and contrast. The most common beginner mistake is shooting from too far; the best "upgrade" is two strokes closer (while keeping a respectful distance from the animal).
Shooting through ten metres of water is like shooting through ten coloured glass panes: each layer removes some colour and sharpness. Remove nine panes (get closer), and the image is suddenly clear and colourful. Water is that stack of coloured panes.
Restoring colour: light, filter and white balance
If getting close is not enough (or the subject is too deep), you restore colour in three ways. Artificial light (flash or video light): brings fresh, full light that only has to travel a short distance through water, so red and colour return. This is the most powerful solution, especially at depth and for macro. Keep the light angled/to the side to avoid backscatter. Red filter: a filter that cuts the dominant blue so the remaining colours come out better in ambient light (without flash). It works well in shallow, clear, sunny water (like the clear Mozambican reefs at 12 to 20 m in the dry season), but not deep, not in shade, and not together with a flash. White balance: many cameras (including GoPros) can correct the white balance manually or with an underwater-automatic mode, making colours more natural in ambient light. Rule of thumb: shallow and sunny, you can go far with a red filter and white balance; deeper, in shade, or for macro, you need artificial light.
Composition: from snapshot to image
Technique makes your photo sharp and colourful; composition makes it beautiful. Shoot at eye level or slightly upward, not down from above. A manta or turtle from below against the blue or the sunlight is dramatic; from above against the bottom it is flat. Catch the eye: a sharp eye (of a moray, grouper or turtle) makes a portrait come alive; if the eye is out of focus, the whole photo feels wrong. Use the rule of thirds: don't always place your subject in the centre but on a third-line; let it "look/swim into the space". Use negative space: a single barracuda or manta against empty blue can be stronger than a busy image. And look for a clean background: the blue, a coral head, or the sun's surface rather than a cluttered bottom.
Scenario. A diver at Manta Reef (Tofo) photographs a manta ray from above, from too far, camera pointing straight down. The manta becomes a grey blob on a busy bottom. The next dive they lie low, wait for the manta to circle above them, and shoot upward against the bright surface, from close and at eye level. The same manta, but now a dramatic silhouette with colour and depth. Position and angle did the work, not the camera.
Working with a GoPro
The GoPro (and similar action cameras) is the most popular underwater camera, with its own strengths and limits. No optical zoom: you cannot zoom in, so you must get physically close. This forces you straight into the most important rule. Very wide lens: ideal for wide-angle (manta, reef scene, whale shark up close), but poor for small/far (a small fish at distance becomes a dot). For macro you need a macro attachment. Colour: underwater you need a red filter (shallow, ambient light) or a small video light (deeper); without one your footage turns blue. Set the white balance underwater if possible. Stability: GoPros have good stabilisation, but nothing replaces calm, trimmed hovering. Hold the camera with two hands or on a tray/grip, and move slowly. Video versus photo: GoPros excel at video; it is often better to shoot steady video and pull a still from it later than to "hunt" for one photo. Shoot long, stable shots rather than wild movements.
Did you know? Because a GoPro cannot zoom, "zoom with your fins" is the only way: you swim towards your subject. That sounds like a limitation, but it is exactly why GoPro users with good buoyancy often make better animal close-ups than people with expensive cameras who stay hanging at a distance.
Avoiding backscatter
Backscatter is the "snow" in your photos: the flash or lamp light reflecting off suspended particles between you and the subject. Especially in plankton-rich or stirred-up water (as sometimes at Vilanculos around the sandbanks) this is a problem. You reduce it by keeping the light angled/to the side, not straight from the camera, so the particles between you and the subject are not directly lit; by getting closer (less water = fewer particles in the light); and by not shooting in stirred-up sand (good buoyancy and a frog kick keep the water clean).
Shooting the big animals (with ethics)
East Africa turns on the big encounters, and those demand both technique and respect. Manta: stay low below/beside the cleaning station, shoot from below upward, and let the manta circle towards you. Never chase it or shoot from above. Whale shark: wide-angle, close but at the prescribed distance, beside or slightly behind the animal, never in front or above. A flank photo also helps the research (citizen science). Turtle: at eye level, leave the breathing route free, no flash in the face. Shark: calm, low, let the shark make the composition; no chasing. Barracuda, trevally, grouper, moray: a school of barracuda against blue with negative space, or a moray portrait with a sharp eye and light from the side, are classic East African images. The golden rule overrides all technique: the photo is never more important than the animal, the reef or your safety. Never chase, never touch, don't disturb behaviour, and watch your buddy, your air and your depth, even while looking through the viewfinder.
Photographing without forgetting your dive
A camera is an attention-eater. Behind the viewfinder, photographers forget their buddy, their gauge, their depth and their buoyancy. That is a real safety risk. Rules of thumb: be a diver first, photographer second — check your air, depth, time and buddy regularly; don't shoot at the cost of your buoyancy (one hand for the camera, but never lean on coral to stay still); and agree with your buddy that the photographer sometimes "disappears" into their subject, so keep contact.
Real-world examples
The Netherlands (cold, murky). Poor visibility and little colour make white balance and shooting very close essential here; macro (nudibranchs, crabs) often works better than wide-angle. A good training school for "close and light".
Egypt (Red Sea, clear). Excellent visibility and much colour make wide-angle reef scenes and sunlight silhouettes rewarding; a red filter works well on the shallow reefs, artificial light on the wrecks (around 30 m).
Indonesia (macro/muck). The macro mecca: nudibranchs, seahorses, mimic octopus. Here everything turns on artificial light, patience and a macro attachment, and on buoyancy so you don't stir up sand.
Maldives (drift, big). Wide-angle for mantas and sharks in current; stability and getting close without disturbing the animal are the challenge.
Mozambique (Tofo and Vilanculos, East Africa). At Tofo you photograph the stars of East Africa: mantas at the cleaning stations of Manta Reef and Giant's Castle, whale sharks (often snorkelling, wide-angle), plus reef life such as moray eels, barracuda, grouper (rock cod), trevally and red bass on the colourful reefs of 12 to 20 metres. The dry season (roughly May to October) gives the best visibility (often tens of metres) and the calmest water, ideal for wide-angle. At Vilanculos and the Bazaruto Archipelago you photograph colourful coral, various rays, turtles, and with luck the rare dugong on the seagrass flats; the visibility here varies more with sand and tide, so watch extra for backscatter and white balance. For both: get close, bring light, and remain a respectful, well-trimmed guest.
Common mistakes
| Mistake | What goes wrong | How to avoid it |
|---|---|---|
| Shooting from too far | Blue, dull, blurred photo | Get closer; "zoom with your fins" |
| No light/filter/white balance | Everything blue-green, no colour | Red filter (shallow) or artificial light (deep); set white balance |
| Shooting down from above | A flat photo against a busy bottom | Go low, shoot at eye level or upward |
| Flash straight ahead in murky water | Backscatter ("snow") | Keep light angled/to the side; get closer |
| Poor buoyancy / leaning on coral | Blurred photo, reef damage | Improve trim; never lean on coral |
| Chasing animals for the photo | Disturbance, the animal flees, no photo | Let the animal come; patience and distance |
| Forgetting buddy/air/depth behind the lens | Safety risk | Be a diver first; check regularly |
| Using a GoPro deep without colour correction | Blue footage | Filter or light; set the white balance |
Pro tips
- Remember the three keys: get Close, add Light, stay Calm. This improves your photos more than any expensive gear.
- Zoom with your fins: get (with respect for the animal) physically closer rather than zooming, certainly with a GoPro.
- Go low and shoot at eye level or upward against the blue or the sunlight; avoid down-from-above images.
- Choose your light solution by depth: red filter and white balance shallow and sunny, artificial light deeper or for macro.
- Keep artificial light angled/to the side to avoid backscatter, and never shoot in stirred-up sand.
- Be a diver first: check air, depth, time and buddy, and never lean on coral for a photo.
Frequently asked questions
Why do underwater photos often turn out blue and dull, and what is the main fix? Water absorbs colour (red first) and refracts light, so the more water between lens and subject, the less colour and sharpness. The main fix is getting closer, so there is less water between; then bringing light (flash/filter) and correcting the white balance.
When do you use a red filter and when artificial light? A red filter works in shallow, clear, sunny water on ambient light (and not together with a flash). Artificial light (flash/lamp) you use deeper, in shade and for macro, where ambient light is insufficient.
What is backscatter and how do you avoid it? The reflection of your flash/lamp light off suspended particles, giving "snow" in the photo. You avoid it by keeping the light angled/to the side, getting closer, and not shooting in stirred-up sand.
Why does a GoPro force you into good dive technique? A GoPro has no optical zoom, so you must get physically close ("zoom with your fins"), which requires good buoyancy and calm approach. It also needs a filter or lamp for colour. So the camera links good photos to good dive technique.
How do you photograph a manta respectfully and well? Stay low below or beside the cleaning station, let the manta circle towards you, and shoot from below at eye level against the bright surface. Never swim after it or above it; the composition comes from position, not chasing.
Summary
Underwater photos disappoint because of physics: water absorbs colour (red first) and refracts light, so at distance everything looks blue, dull and further away. The main fix is getting close, because every metre less water restores colour and sharpness; you also restore colour with a red filter and white balance (shallow and sunny) or with artificial light (deeper and for macro), keeping that light angled to avoid backscatter. Remember the three keys: get close, add light, stay calm. Composition lifts a snapshot to an image: shoot at eye level or from below upward, catch a sharp eye, use the rule of thirds and negative space, and find a clean background. A GoPro forces good technique because it cannot zoom (you "zoom with your fins") and needs colour correction; it excels at video, from which you pull a still. You photograph the big animals of East Africa, the mantas, whale sharks, turtles and reef life of Tofo and Bazaruto, with the same technique and with respect: never chase, touch or disturb, and the right position per animal. Above all you remain a diver first and a photographer second: check your air, depth, time and buddy, and let the photo never be more important than the animal, the reef or your safety.
The 10 things every diver should know by heart
- Photos turn out blue from colour absorption and distance (physics).
- The main fix is getting close; "zoom with your fins".
- Remember the three keys: get Close, add Light, stay Calm.
- Red filter + white balance shallow/sunny; artificial light deeper or for macro.
- Keep light angled/to the side against backscatter and don't shoot in stirred-up sand.
- Shoot at eye level or from below upward; catch a sharp eye.
- A GoPro has no zoom and forces good technique; it excels at video.
- Photograph the big animals respectfully: right position/distance, never chase or touch.
- Be a diver first: check air, depth, time and buddy; never lean on coral.
- In East Africa (Tofo/Bazaruto): get close, bring light, use the clear dry season, and respect manta, whale shark, turtle and reef.